
Download Universal x86 Tuning Utility for Windows
Take full control of your Intel or AMD processor. Adjust TDP limits, undervolt your CPU, overclock the iGPU, and let Adaptive Mode handle thermals on the fly.
Intel + AMD in One Tool
Supports Zen 1–4 and Intel 4th gen through Meteor Lake. No need for separate utilities.
Adaptive TDP Control
Set a target temperature and the algorithm adjusts power limits in real time to stay there.
Per-Game Profiles
Assign tuning presets to individual games. UXTU switches automatically at launch.
Curve Optimizer & Undervolting
Per-core voltage offsets on AMD Zen. Reduce temps and power without losing performance.
What Is Universal x86 Tuning Utility?
A single, open-source tool that puts full processor control in your hands — whether you run Intel or AMD.
Universal x86 Tuning Utility (UXTU) is a free, open-source Windows application for controlling your processor’s power delivery, voltage, and thermal behavior. Built by independent developer JamesCJ60, it supports both Intel (4th gen Haswell through Meteor Lake) and AMD (Zen 1 through Zen 4) processors from one interface. No other tool covers that range.
Most laptop and desktop users never touch their CPU’s power settings because those options sit buried in BIOS or locked away entirely by the manufacturer. The result: unnecessary heat, wasted battery, or performance left untapped. UXTU fixes that problem. It wraps the same TDP, voltage, and clock controls into a clean Windows UI that anyone comfortable reading hardware specs can navigate. Premade presets handle the basics — Eco, Balanced, Performance, Extreme — while Custom Presets and Curve Optimizer unlock per-core tuning for people who want full control.
Who Is UXTU For?
The biggest audience is AMD Ryzen laptop owners looking to lower temperatures, stretch battery life, or get better frame rates from integrated graphics. Desktop users run it to undervolt for quieter fans. Mini PC builders manage thermals in tight enclosures. And handheld PC owners running a ROG Ally, Legion Go, or Ayaneo use the sibling app UXTU Handheld, built by the same developer with a touch-friendly interface.
How Does It Compare to Alternatives?
Before UXTU, you needed separate tools for each brand: AMD Ryzen Master (desktops only), Intel XTU (Intel only), ThrottleStop (Intel laptops), and RyzenAdj (command line, AMD mobile). UXTU consolidates all of that into one program. It actually calls RyzenAdj under the hood for AMD tuning, then adds a graphical layer, a preset system, per-game profiles, automation rules, and an adaptive TDP algorithm on top.
The project lives on GitHub under GPL-3.0, is funded entirely by optional Patreon donations, and has an active Discord community. The V3 beta — currently in development — introduces AutoOC (machine-learning-based undervolting) and a new PawnIO driver backend that replaces WinRing0 for better security and compatibility.
Key Features
From one-click presets to per-core undervolting, UXTU covers every angle of CPU and GPU optimization.
Premade Presets
One-click tuning profiles built for Zen-based processors. Choose Eco for battery life, Balanced for daily use, Performance for gaming, or Extreme for benchmarks. Each preset adjusts STAPM, fast limit, slow limit, and thermal targets in a single action — no manual slider work required.
Custom Presets
Full manual control over every tuning parameter. Set exact TDP values, voltage offsets, clock speeds, and thermal limits individually. Save multiple configurations and switch between them depending on your workload — one for rendering, another for gaming, a third for travel on battery power.
Adaptive Mode
A dynamic algorithm that reads CPU temperature in real time and adjusts power limits automatically. Set your target temp — say 80°C — and the algorithm raises TDP when thermals allow, backs off when heat builds up. More effective than a static preset because it responds to changing workloads on the fly.
CPU Power Limit Control
Adjust STAPM (Skin Temperature Aware Power Management), fast limit, and slow limit independently. Control short and long boost periods with exact wattage values from as low as 5W in eco mode up to your processor’s max supported TDP. Both Intel PL1/PL2 and AMD equivalents are covered.
CPU Undervolting / Curve Optimizer
AMD Curve Optimizer support with per-core voltage offset tuning for up to 12 cores. Lower voltage to reduce temperatures and power draw without losing clock speed. The V3 beta adds AutoOC — a machine-learning system that finds your optimal offsets automatically by monitoring hardware errors in real time.
iGPU Overclocking
Push AMD integrated graphics beyond stock speeds. Adjust iGPU clock frequency and power limits for better frame rates in lightweight games or GPU-accelerated tasks. Particularly useful on Ryzen 6000 and 7000 APUs where the RDNA-based iGPU handles actual gaming loads at 1080p.
NVIDIA GPU Tuning
Built-in support for discrete NVIDIA GPU overclocking through the ADLX SDK. Adjust core clock offsets, memory speeds, and GPU power limits directly from UXTU without running a separate tool like MSI Afterburner. Useful for laptops where you want CPU and GPU tuning in one place.
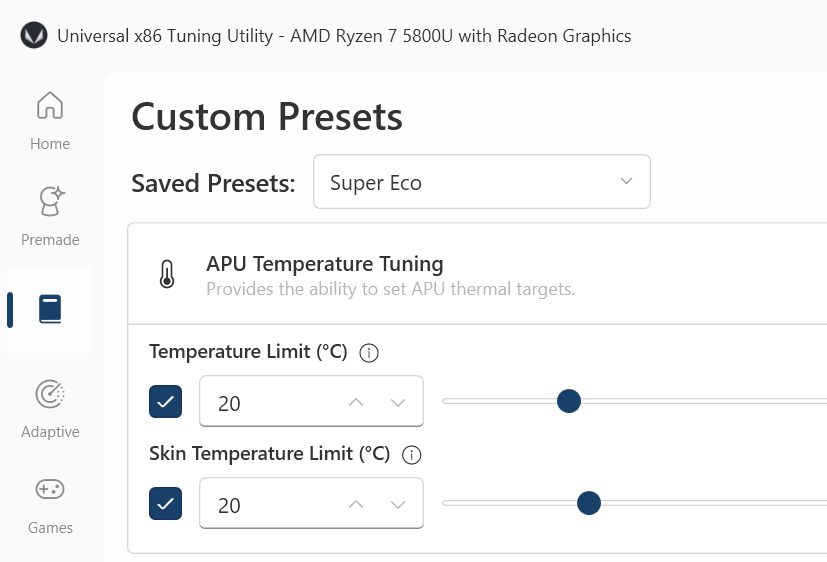
Temperature Limit Control
Set custom thermal throttling thresholds for CPU and GPU independently. If your laptop runs hot under load, lower the temp limit to force earlier throttling. This keeps fan noise manageable and prevents uncomfortable keyboard and palm rest temperatures during long sessions.
Game Library with Per-Game Profiles
UXTU detects installed games and displays them in a built-in library. Assign a specific tuning preset to each title — when you launch that game, UXTU switches to its profile automatically and reverts to your default when you close it. No manual switching between tasks.
Automations
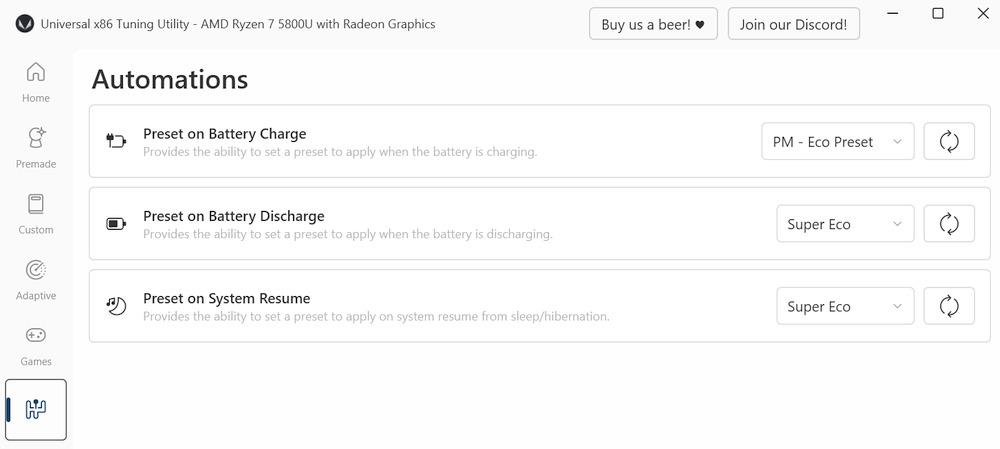
Trigger profile changes based on system events without any manual input. Switch to Eco when you unplug from AC power. Apply Performance when a specific application launches. Schedule a quiet mode for nighttime. All rules run in the background through UXTU’s system tray process.
System Information
A built-in hardware dashboard shows your CPU model, core count, base and boost clocks, GPU name, VRAM capacity, installed RAM, and other device specs. Useful for verifying which processor family you have before choosing a preset, or checking compatibility with specific UXTU features.
VRM Current Control
Adjust EDC (Electrical Design Current) and TDC (Thermal Design Current) limits on AMD processors. These VRM parameters control the maximum current the voltage regulator delivers to the CPU, allowing finer power delivery tuning beyond what standard TDP adjustments provide.
System Requirements
UXTU runs on any modern Windows PC with an Intel or AMD processor. Here is what you need.
| Component | Minimum | Recommended |
|---|---|---|
| Operating System | Windows 10 (64-bit) | Windows 11 23H2 or later |
| Processor (AMD) | Zen 1 (Ryzen 1000 series) | Zen 3 / Zen 4 (Ryzen 5000-7000) |
| Processor (Intel) | 4th Gen (Haswell) | 12th Gen (Alder Lake) or newer |
| RAM | 4 GB | 8 GB or more |
| Disk Space | 50 MB | 100 MB (with .NET runtime) |
| Runtime | .NET 7.0 Desktop Runtime | .NET 7.0 or 8.0 Desktop Runtime |
| Permissions | Administrator access | Administrator access |
| Internet | For download only | Works fully offline after install |
Note: Ryzen 7045HX (Dragon Range) processors are not supported. Intel features are more limited than AMD features.
Download Universal x86 Tuning Utility V2.5.6
Grab the latest stable release directly from the official GitHub repository. Pick the format that fits your setup.
MSI Installer
Standard Windows installer. Creates a desktop shortcut, registers in Windows Programs, and checks for .NET 7.0 automatically. Best for most users who want a normal install experience.
Download MSIPortable ZIP
Extract and run. Nothing touches the registry or system folders. Keep it on a USB drive, test without committing, or run alongside the MSI version. Same features, zero installation footprint.
Download ZIPWinget
Install and update from the command line using Windows Package Manager. Run one command and Winget handles the download, version tracking, and future upgrades for you.
Screenshots
See Universal x86 Tuning Utility in action across its main interface screens.

Getting Started with Universal x86 Tuning Utility
From download to your first tuning profile in under ten minutes.
Downloading UXTU
Head to our download section above and grab the latest stable release (V2.5.6). You have three options:
- MSI Installer (~20 MB) — The recommended choice for most users. It creates a desktop shortcut, registers the app in Windows Programs, and checks whether you have the .NET 7.0 Desktop Runtime installed. If you want a standard Windows install, pick this.
- Portable ZIP (~15 MB) — Extract to any folder and run the executable directly. Nothing gets written to the registry or system folders. Best for testing UXTU without committing, keeping it on a USB drive, or running it alongside other tuning tools.
- Winget — If you use Windows Package Manager, run
winget install JamesCJ60.Universalx86TuningUtilityfrom any terminal. Winget handles the download and lets you update later withwinget upgrade.
All three methods install the same V2.5.6 release with the same feature set. The MSI is the safest bet if you have never used a portable app before.
Installation Walkthrough
Handling Windows SmartScreen (Important): Because UXTU is not signed with a paid code-signing certificate, Windows SmartScreen will likely show a blue “Windows protected your PC” warning the first time you run the installer. This does not mean the file is dangerous. To proceed:
- Click More info (the small text link below the warning message).
- Click Run anyway.
- The installer starts normally after that.
This SmartScreen warning appears for most open-source software that hasn’t purchased an Authenticode certificate (typically $200-400/year). The UXTU source code is publicly auditable on GitHub.
MSI Installer steps:
- Welcome screen — Click Next.
- Install location — The default path (
C:\Program Files\Universal x86 Tuning Utility) works fine. Change it only if you store apps on a different drive. - Ready to install — Click Install. Accept the UAC prompt when Windows asks for administrator permission.
- Finish — The installer creates a desktop shortcut and a Start Menu entry. You can launch UXTU immediately.
Portable version: Right-click the ZIP, select Extract All, pick a folder, and open it. Run Universal x86 Tuning Utility.exe by right-clicking and choosing Run as administrator. Admin rights are mandatory — hardware tuning requires direct access to CPU registers through the kernel driver.
.NET Runtime prompt: If the app asks you to install the .NET 7.0 Desktop Runtime, follow the link. This happens when your system only has .NET 8.0. UXTU V2.x specifically targets .NET 7.0. The runtime is around 50 MB and installs in under a minute. Both .NET 7.0 and 8.0 can coexist without issues.
Initial Setup and Configuration
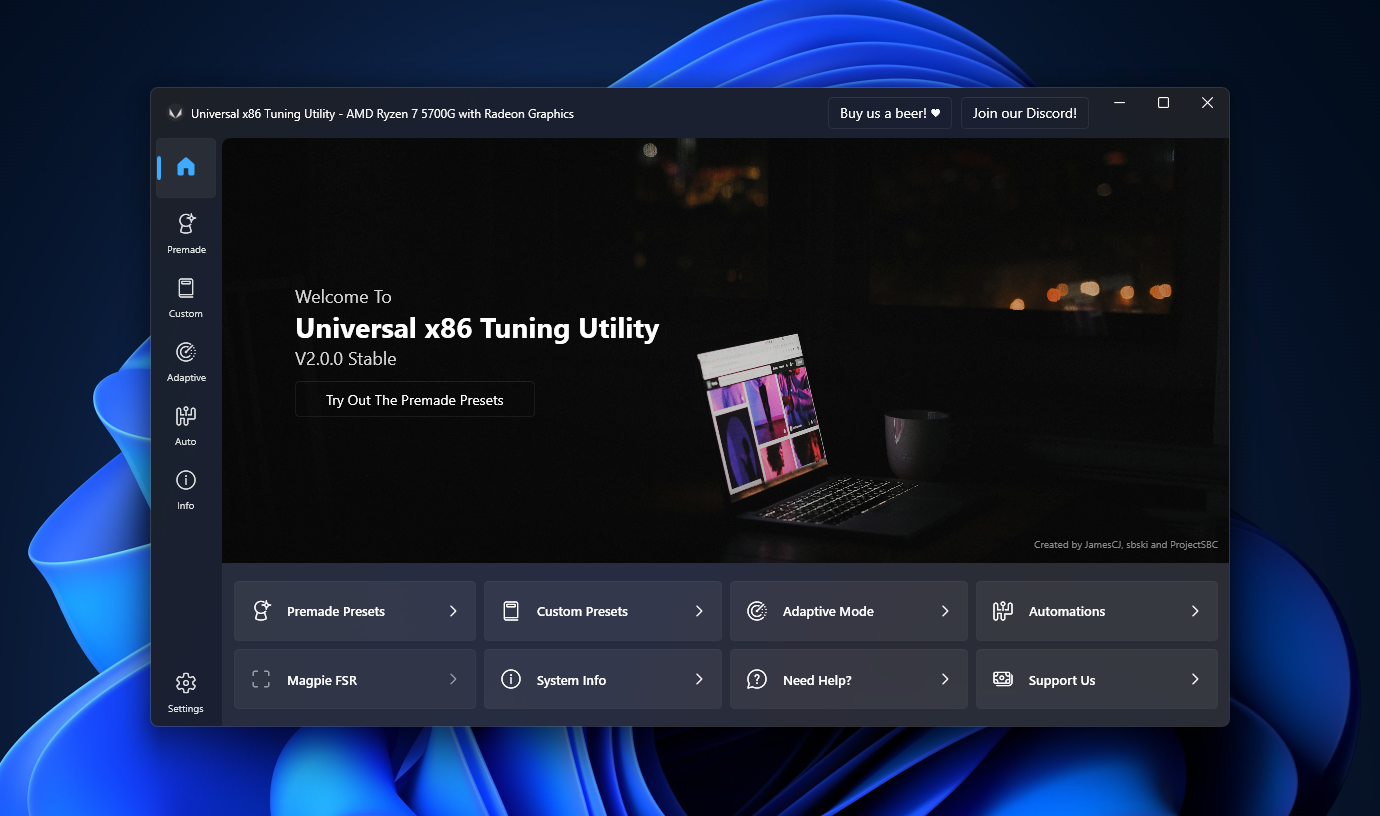
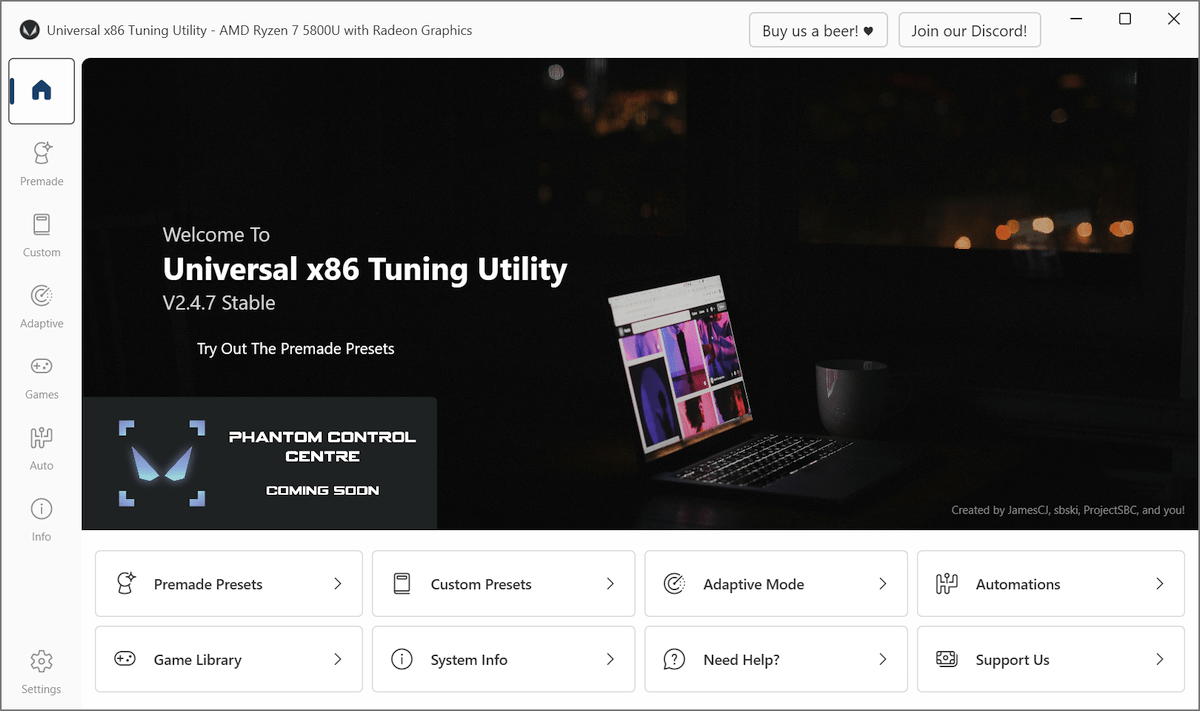
When UXTU launches for the first time, you land on the Home dashboard. The left sidebar shows all available sections: Home, Premade Presets, Custom Presets, Adaptive Mode, Game Library, System Info, Automations, and Settings.
Check System Info first. Click System Info in the sidebar to confirm UXTU detects your CPU correctly. You should see your processor model, core count, base clock, and GPU info. If the CPU shows as “Unknown” or the app displays an error, your processor may not be in the supported list — check the system requirements above.
Essential settings to change in Settings tab:
- Start with Windows — Enable this so UXTU launches at boot. Your last applied preset loads automatically when the app starts, so your tuning persists across reboots.
- Minimize to tray — Keeps UXTU in the system tray instead of the taskbar. It runs in the background without cluttering your workspace.
- Apply last preset on startup — Without this toggle, your CPU reverts to stock settings every time you restart. Turn it on to make tuning persistent.
- Theme — Dark by default. On Windows 11 the Mica effect gives the window a translucent background that blends with your desktop wallpaper.
Your First Tuning Profile
The safest starting point is Premade Presets. Click that tab in the sidebar. You will see four profiles:
- Eco — Drops TDP to around 10-15W. Ideal for battery-powered browsing, documents, and video calls. Fans stay quiet, temperatures stay low, and battery lasts noticeably longer.
- Balanced — A middle ground with moderate TDP limits. Good for everyday use where you want decent speed without excessive heat or battery drain.
- Performance — Raises TDP limits above stock. Temperatures and fan noise increase, but you get measurably better multi-threaded performance and iGPU frame rates.
- Extreme — Pushes TDP to the processor’s maximum supported value. Use this for short benchmark runs or demanding tasks where you accept high temps and full fan speed.
Click any preset to apply it immediately. UXTU sends the new power limits to the CPU through the kernel driver. Verify the change in Task Manager (Performance tab → CPU → check clock speed) or HWiNFO64 — look for STAPM Power and CPU Package Power readings.
Moving to Custom Presets: Once comfortable with premade options, the Custom Presets tab gives slider-level control. Set exact values for STAPM Limit, Fast Limit, Slow Limit, Temperature Limit, iGPU Clock Speed, and Curve Optimizer offsets. Save your configuration with a name, and it appears in the preset list for quick switching.
Trying Adaptive Mode: For a hands-off approach, open the Adaptive Mode tab and click “Start Adaptive Mode.” Set your target CPU temperature (e.g., 80°C) and let the algorithm handle TDP adjustments dynamically. This works well for gaming sessions where workload intensity fluctuates between menus and action.
Tips, Tricks, and Best Practices
Monitor while you tune. Run HWiNFO64 alongside UXTU to watch real-time CPU power, temperature, clock speed, and voltage. This tells you exactly what your preset changes are doing and helps you catch instability early.
Set up power-source Automations. Go to the Automations tab and create a rule that switches to Eco mode when you unplug from AC power, and Performance mode when you plug back in. This alone can add 30 to 60 minutes of battery life on most Ryzen laptops.
Per-game profiles save time. If you play a mix of light indie titles and heavy AAA games, assign different presets to each in the Game Library. UXTU detects game launches and applies the right profile automatically, reverting when you close the game.
Curve Optimizer tuning takes patience. Per-core undervolting gives the best results but requires methodical testing. Start with a conservative -10 offset on all cores, stress test for 30 minutes (Cinebench R23 or AIDA64 work well), then push further one core at a time in increments of -5. When you hit instability, back off by 5 from the unstable value and save that as your stable offset.
Back up your presets before updating. Custom presets are saved as JSON files in the UXTU application folder. Copy these before installing a new version so you can restore your settings if the update resets them.
Where to get help:
- Official docs: The GitHub wiki has detailed feature explanations and troubleshooting.
- Discord: The UXTU Discord server is active — the developer and community share presets and help troubleshoot setups.
- Reddit: r/AMDLaptops and r/AMDHelp regularly discuss UXTU configurations for specific laptop models.
Frequently Asked Questions
Answers to the most common questions about Universal x86 Tuning Utility.
Is Universal x86 Tuning Utility free to download?
Yes. UXTU is completely free and open source under the GPL-3.0 license. There are no paid tiers, no feature locks, no ads, and no bundled software.
Here is what “free” means in practice:
- No premium version — Every feature in the application is available to all users at no cost, including Curve Optimizer, Adaptive Mode, and per-game profiles.
- No registration or account required — Download the MSI or ZIP and run it. No email, no sign-up, no license key.
- No ads or telemetry — UXTU does not display ads, does not collect usage data, and does not phone home for any reason.
The developer (JamesCJ60) accepts optional donations through Patreon and PayPal to fund ongoing development. Donating is entirely voluntary and does not unlock additional features. You can download the latest release from our download section or the official GitHub releases page.
Is UXTU safe for Windows 10 and Windows 11?
Yes. UXTU is safe to use on both Windows 10 and Windows 11, including the latest 23H2 and 24H2 builds. The full source code is publicly available on GitHub and has been reviewed by thousands of users.
Why antivirus tools sometimes flag UXTU:
- UXTU uses the WinRing0 kernel driver to access CPU registers for hardware tuning. Some antivirus programs flag this driver as “potentially unwanted” because kernel-level access is a sensitive operation.
- This is a known false positive. The same WinRing0 driver is used by trusted tools like HWiNFO64, CPU-Z, and Open Hardware Monitor.
- If your antivirus blocks UXTU, add the application folder to your exclusion list. On Windows Defender: Settings → Privacy & security → Virus & threat protection → Manage settings → Exclusions → Add folder.
Why SmartScreen shows a warning: UXTU is not signed with a paid code-signing certificate ($200-400/year), so Windows SmartScreen displays a blue warning on first run. Click “More info” then “Run anyway” to proceed. This is standard for most open-source utilities.
Does UXTU support Intel processors or only AMD?
UXTU supports both Intel and AMD processors, though AMD support is more extensive.
AMD support (Zen 1 through Zen 4):
- Full TDP control (STAPM, fast limit, slow limit)
- Curve Optimizer with per-core voltage offsets
- iGPU clock speed and power limit adjustment
- VRM current control (EDC/TDC limits)
- Temperature limit control
- Adaptive Mode with dynamic TDP
Intel support (4th gen Haswell through Meteor Lake):
- TDP adjustment (PL1/PL2 limits)
- Temperature limit control
- Basic power management
Intel-specific features like per-core undervolting via voltage offset are not yet available in UXTU. If you run an Intel system and need advanced undervolting, ThrottleStop remains the stronger option for that specific task. Many users run both tools together — ThrottleStop for voltage control and UXTU for TDP, Adaptive Mode, and game profiles.
Can UXTU damage my hardware?
Under normal use, no. UXTU operates within the parameters your processor’s firmware allows. It does not bypass hardware safety limits.
What can happen with aggressive settings:
- System crash (BSOD) — The most common result of pushing Curve Optimizer offsets too far. Fix: reboot. The system returns to stock settings.
- Application freeze — Some apps may hang if undervolting causes a core to become unstable under specific workloads. Fix: back off your voltage offset by 5.
- Accelerated wear — Running at maximum TDP with thermal limits disabled for months could theoretically shorten component lifespan. In practice, the premade presets and Adaptive Mode prevent this.
Key safety detail: UXTU settings are stored in software, not flashed to BIOS. A restart always returns your CPU to factory defaults. There is no risk of bricking your system or being stuck with bad settings — just reboot if anything goes wrong.
Tip: Start with premade presets. They have been tested across many systems. Only move to Custom Presets and Curve Optimizer after you understand how each parameter affects your hardware.
How do I undervolt my CPU with UXTU?
Undervolting in UXTU is done through the Curve Optimizer feature on AMD Zen processors. It reduces CPU voltage to lower temperatures and power consumption without sacrificing clock speed.
Step-by-step process:
- Open UXTU and go to Custom Presets.
- Scroll to the Curve Optimizer section.
- Set a conservative starting offset of -10 for all cores.
- Click Apply and run a stress test (Cinebench R23, AIDA64, or Prime95) for 30 minutes.
- If the system stays stable, increase the negative offset to -15 and test again.
- Continue in increments of -5 until you see a crash or BSOD.
- Back off by 5 from the crash value — that is your stable all-core offset.
For per-core tuning (best results): After finding your all-core limit, test each core individually. Some cores are “golden” and can handle -25 or -30, while others may only manage -10. Per-core tuning takes more time but yields lower temperatures overall.
Note for Intel users: UXTU does not currently support per-core voltage offsets on Intel processors. If you need Intel undervolting, use ThrottleStop for voltage control and UXTU for TDP management.
What is Adaptive Mode and how does it work?
Adaptive Mode is an intelligent TDP algorithm that adjusts your CPU’s power limit based on real-time temperature readings, instead of locking you into a static wattage value.
How it works:
- You set a target temperature (e.g., 80°C).
- The algorithm monitors CPU temperature continuously.
- When thermals are cool (light workload), it raises TDP for faster response.
- When temperature climbs near the target (heavy workload), it lowers TDP to prevent overheating.
Why it is better than a static preset:
- A static 25W preset wastes headroom during light tasks and may overheat during heavy bursts. Adaptive Mode uses all available thermal headroom when it exists and backs off when it doesn’t.
- Particularly effective during gaming, where workload intensity fluctuates between menus (light) and gameplay (heavy).
V3 Beta — AutoOC: The upcoming V3 release adds AutoOC, which goes further by using machine learning to find optimal Curve Optimizer offsets. It monitors hardware error events in real time and adjusts voltage offsets automatically, removing the manual trial-and-error process entirely.
Do UXTU settings persist after a reboot?
By default, no. When you shut down or restart, your CPU reverts to stock settings because UXTU changes are applied at the software level, not written to BIOS firmware.
To make settings persistent, enable two options in UXTU Settings:
- Start with Windows — Adds UXTU to your startup apps so it launches at boot.
- Apply last preset on startup — Tells UXTU to reapply your most recent tuning profile the moment it launches.
With both enabled, UXTU starts in the system tray at boot and immediately applies your saved preset. The whole process takes about 2-3 seconds after login.
Safety benefit of this design: If UXTU crashes, gets uninstalled, or fails to start, your CPU runs at factory defaults. There is no risk of being stuck with unstable settings after a bad undervolt — just reboot without running UXTU and everything reverts.
UXTU crashes on startup — how do I fix it?
Startup crashes are usually caused by one of three things. Work through these fixes in order:
1. Antivirus blocking the WinRing0 driver
- Bitdefender, Kaspersky, Norton, and some other tools flag the kernel driver that UXTU uses for hardware access.
- Fix: Add the entire UXTU folder to your antivirus exclusion list. On Windows Defender, go to Settings → Virus & threat protection → Exclusions → Add folder.
2. Corrupted configuration files
- If UXTU was closed during a save operation, its JSON config files may be corrupted.
- Fix: Navigate to the UXTU application directory and delete any
.jsonfiles that store preset data. The app regenerates default configs on next launch. Your saved presets will be lost — another reason to back them up regularly.
3. Missing .NET 7.0 Desktop Runtime
- UXTU V2.x requires .NET 7.0 specifically, even if you have .NET 8.0 installed.
- Fix: Download and install .NET 7.0 Desktop Runtime from Microsoft. It coexists with other .NET versions without conflict.
If none of these resolve the issue, try the portable ZIP version instead of the MSI installer. You can also search the GitHub Issues page for your specific error message — the developer actively responds to bug reports.
UXTU settings are not applying on my laptop — what should I do?
Some laptop manufacturers lock power management in BIOS firmware, which overrides software-level TDP changes from tools like UXTU. This is most common on certain Lenovo Legion, HP Victus, and Dell G-series models.
Troubleshooting checklist:
- Confirm administrator rights — Right-click the UXTU shortcut and verify “Run as administrator” is enabled. Without admin access, settings appear to apply in the UI but actually do nothing at the hardware level.
- Monitor with HWiNFO64 — Open HWiNFO64, go to the sensors panel, and watch the “STAPM Power” or “CPU Package Power” reading. Apply a UXTU preset and check whether the power value changes. If it stays the same, BIOS is likely blocking the adjustment.
- Check for BIOS power locks — Some BIOS versions have a “Performance Mode Lock” or “Power Management” setting that restricts third-party tools. Look in your BIOS advanced settings or security tab.
- Update BIOS — Some manufacturers add or remove power management restrictions in BIOS updates. Check your laptop manufacturer’s support page for the latest version.
- Try Adaptive Mode instead — On some locked systems, Adaptive Mode still works because it adjusts limits within the existing BIOS-allowed range rather than trying to override BIOS-imposed caps.
If none of these work, your laptop’s firmware may hard-lock power settings. Check the UXTU Discord server for reports from other users with the same model — there may be a known workaround.
Does UXTU work on desktop PCs or only laptops?
UXTU works on both desktops and laptops. The full feature set is available on both, though some features are more relevant to one form factor.
Most useful on laptops:
- TDP control (STAPM, fast/slow limits) — manages power in thermally constrained chassis
- Temperature limit adjustment — reduces keyboard/palm rest heat
- Adaptive Mode — dynamic TDP for varying workloads
- Battery-source Automations — switches to Eco on battery, Performance on AC
Most useful on desktops:
- Curve Optimizer undervolting — lower temperatures and power draw
- NVIDIA GPU overclocking — core and memory clock adjustments
- Per-game profiles — automated tuning per application
Mini PC users (Intel NUC, Beelink, MinisForum) benefit from both sets of features since compact cases have cooling constraints similar to laptops.
How do I update UXTU to the latest version?
UXTU V2.x does not have a built-in auto-updater. Here is how to update using each installation method:
MSI Installer:
- Download the new MSI from our download section or GitHub releases.
- Run the installer. It detects the existing installation and upgrades in place.
- Custom presets (stored as JSON) are preserved automatically during MSI upgrades.
Portable ZIP:
- Download the new ZIP file.
- Back up your
.jsonpreset files from the current folder. - Extract the new ZIP to the same directory, overwriting existing files.
- Copy your preset files back if they were overwritten.
Winget:
- Run
winget upgrade JamesCJ60.Universalx86TuningUtilityin any terminal. - Winget handles the download and in-place upgrade automatically.
Tip: Follow the GitHub releases page (click “Watch” → “Releases only”) to get notified when new versions drop.
Can I use UXTU to improve laptop battery life?
Yes, and this is one of the most popular reasons people install UXTU. Lowering your CPU’s TDP directly reduces power consumption, which extends battery runtime.
How to set it up:
- Apply the Eco preset or create a custom preset with TDP set to 10-15W (for most Ryzen laptops).
- Go to Automations and create a rule: “When power source changes to Battery, apply Eco preset.”
- Create a second rule: “When power source changes to AC, apply Performance preset.”
- For maximum savings, also lower the iGPU clock speed and set a conservative temperature limit (70°C) to keep fan speed — and therefore total system power draw — as low as possible.
Real-world results: Users on r/AMDLaptops regularly report gaining 30 to 90 minutes of additional battery life depending on the laptop model and workload. The biggest gains come from laptops whose manufacturers set aggressive default TDP values that burn through battery even during light tasks like web browsing.
Tip: Test your baseline battery life with a tool like BatteryBar before applying UXTU, then test again after. This gives you a concrete before/after comparison instead of guessing.
UXTU vs ThrottleStop — which should I use?
It depends entirely on your processor brand and what you need to tune.
Choose UXTU if:
- You have an AMD processor — ThrottleStop does not support AMD at all.
- You want per-game profiles or automation rules — ThrottleStop lacks both features.
- You use both Intel and AMD machines and want a single tool with a unified interface.
- You want Adaptive Mode for dynamic, temperature-based TDP management.
Choose ThrottleStop if:
- You have an Intel processor and need per-core undervolting via voltage offset — ThrottleStop has deeper Intel voltage control than UXTU.
- You need SpeedShift tuning or C-state management — advanced Intel power states that UXTU does not expose.
- You want the most mature, battle-tested Intel tuning tool available.
Use both together: Many Intel laptop users run ThrottleStop for voltage control and UXTU for TDP limits and Adaptive Mode. The two tools can coexist, though you should avoid adjusting the same parameter in both.
UXTU vs Ryzen Master — what is the difference?
AMD Ryzen Master is the official AMD overclocking tool. It is polished and well-supported, but has a narrower scope than UXTU for most users.
Where UXTU wins:
- Laptop TDP control — Ryzen Master focuses on desktop processors and does not support STAPM or fast/slow limit tuning on laptops. UXTU was built specifically for this.
- Portability — UXTU has a portable ZIP option; Ryzen Master requires a full install.
- Per-game profiles and Automations — Ryzen Master has no per-application profile switching or event-based automation.
- Adaptive Mode — Dynamic TDP based on temperature is unique to UXTU.
Where Ryzen Master wins:
- Desktop overclocking depth — Per-CCX multiplier tuning, memory timing control, and detailed per-core monitoring for desktop Ryzen chips.
- Official AMD support — Signed driver, official documentation, and AMD customer service backing.
Bottom line: For laptop users, UXTU is the better tool. For desktop users doing serious overclocking with memory tuning, Ryzen Master provides more granular control. For desktop users who just want undervolting and TDP adjustment, UXTU covers the basics well.
Does UXTU support Ryzen 7045HX (Dragon Range)?
No. The Ryzen 7045HX (Dragon Range) series is explicitly not supported by UXTU. This includes the Ryzen 9 7945HX, Ryzen 7 7745HX, Ryzen 5 7545HX, and related SKUs.
Why it is not supported:
- Dragon Range processors use a different power management architecture than standard Zen 4 mobile chips (Phoenix).
- The RyzenAdj backend that UXTU V2.x uses for AMD tuning cannot communicate with Dragon Range’s power management controller.
- UXTU will either fail to detect the processor or display settings that do not actually apply.
Future support: The V3 beta introduces a new PawnIO driver backend that replaces WinRing0. This new driver architecture may eventually enable Dragon Range support, but there is no confirmed timeline. Monitor the GitHub repository for updates.
Alternative for Dragon Range users: For basic TDP control on 7045HX laptops, check the manufacturer’s built-in power management (Lenovo Vantage, ASUS Armoury Crate, etc.) or use RyzenAdj directly from the command line with the correct SMU arguments for your specific chip.
Why does UXTU ask for .NET 7.0 when I have .NET 8.0?
UXTU V2.x was compiled against the .NET 7.0 Desktop Runtime. Having .NET 8.0 installed does not satisfy the .NET 7.0 requirement because .NET versions are not backward-compatible for desktop applications.
How to fix it:
- Go to the Microsoft .NET 7.0 download page.
- Download the .NET Desktop Runtime 7.0 (not the SDK, not the ASP.NET runtime — specifically the Desktop Runtime).
- Install it. The process takes under a minute.
- Both .NET 7.0 and 8.0 coexist on the same machine without conflict.
When this will stop being an issue: The V3 beta (currently in development) targets .NET 8.0. Once V3 reaches stable release, users with .NET 8.0 will not need a separate runtime. Until then, installing .NET 7.0 alongside your existing runtimes is the easiest fix.
How do I completely uninstall UXTU?
Uninstalling UXTU is straightforward and leaves no permanent system changes behind.
MSI version:
- Open Windows Settings → Apps → Installed apps.
- Search for “Universal x86 Tuning Utility.”
- Click Uninstall and follow the prompts.
- This removes application files, desktop shortcut, Start Menu entry, and registry entries.
Portable version:
- Simply delete the folder containing the extracted files. There is nothing to uninstall since the portable version does not write to the registry or system folders.
After removal: Restart your computer. This ensures the WinRing0 kernel driver is fully unloaded and all CPU settings revert to stock values. Without a restart, the driver may remain loaded in memory until the next reboot.
Cleaning up leftover data: If you want to remove saved presets and config files, check for JSON files in the UXTU application directory (for MSI installs, typically C:\Program Files\Universal x86 Tuning Utility) and in %AppData% before deleting.
What is the difference between UXTU and UXTU Handheld?
UXTU and UXTU Handheld are two separate applications built by the same developer (JamesCJ60) for different device types.
UXTU (Standard):
- Designed for laptops and desktops with keyboard/mouse input
- Standard WPF interface with sidebar navigation
- Full feature set: presets, Custom Presets, Adaptive Mode, Game Library, Automations, Curve Optimizer
UXTU Handheld:
- Designed for handheld gaming PCs like the ROG Ally, Lenovo Legion Go, Ayaneo, GPD Win, and similar devices
- Touch-friendly interface with larger controls optimized for small screens (7-8 inch)
- Device-specific features: TDP profiles linked to game mode buttons, controller-aware UI elements
- Simplified workflow tailored to handheld use cases
Which one to download: If you have a standard laptop or desktop, download regular UXTU from our download section. If you own a handheld gaming PC, download UXTU Handheld from its separate GitHub repository.
Does UXTU work without an internet connection?
Yes. UXTU works completely offline after installation.
What works without internet:
- All tuning features (presets, Custom Presets, Adaptive Mode, Curve Optimizer)
- Per-game profiles and Automations
- System information display
- NVIDIA GPU tuning
- Saving and loading custom presets
What requires internet:
- Downloading the installer or ZIP initially
- Checking for updates (manual process — there is no auto-updater)
The app does not phone home, does not require license activation, does not collect telemetry, and does not download data during use. This also means UXTU does not auto-update — you need to check the GitHub releases page or our download section manually when you want a newer version.
How do I fix iGPU power limit dropping or capping at 15W?
This is a known issue reported on GitHub where the iGPU power cap unexpectedly drops to 15W, causing stutters and frame drops in games that rely on integrated graphics.
What causes it: On AMD APUs, the CPU and iGPU share a single power budget. If the CPU’s TDP fast limit is set too low, the system allocates most of the power envelope to CPU cores, starving the iGPU.
How to fix it:
- Go to Custom Presets.
- Explicitly set the iGPU power limit to your desired value (25-30W is typical for gaming on Ryzen 6000/7000 APUs).
- Make sure the CPU TDP fast limit is high enough to accommodate both CPU and iGPU power draw. For example, if your CPU needs 15W and your iGPU needs 25W, set the fast limit to at least 40-45W.
- If the issue persists, apply a premade Performance or Extreme preset first to raise all limits, then adjust iGPU settings from that higher baseline.
Background: On shared APU designs, the STAPM budget is divided dynamically. UXTU lets you control the allocation, but you need to account for both CPU and iGPU workloads when setting limits. Setting the CPU TDP too high relative to the total budget can inadvertently starve the iGPU.